

How to Verify Outdoor Gear Quality: 7-Step Checklist
Table of Contents
- Why Outdoor Gear Quality Is Harder to Judge Than It Looks
- Your Outdoor Gear Quality Checklist: The 8 Inspection Points
- How to Read Product Specifications and Verify Claims
- How to Spot Counterfeit Outdoor Gear Before You Pay
- How to Evaluate Outdoor Gear Reviews Without Getting Fooled
- How to Test Camping Gear Before a Trip: The Backyard Protocol
- Quality Differences by Gear Category: Tents, Packs, and Poles
- Conclusion
- Frequently Asked Questions
Last Updated: October 21, 2026
Why Outdoor Gear Quality Is Harder to Judge Than It Looks
Two tents can look identical on a product page and behave nothing alike in a storm.
Outdoor gear quality is the sum of materials, construction, and honest specifications, and only one of those three is easy to fake.
Below, we'll show you how to verify outdoor gear quality in seven steps, from in-store seam checks to backyard tests before a trip.
Your Outdoor Gear Quality Checklist: The 8 Inspection Points
Most gear guides tell you to "check the seams" and stop there. What follows is a repeatable inspection sequence with pass/fail criteria.
Before you start, set up three tools: a small kitchen scale (accurate to 0.1 oz), a 12-inch ruler or seam gauge, and a bright flashlight or your phone light.
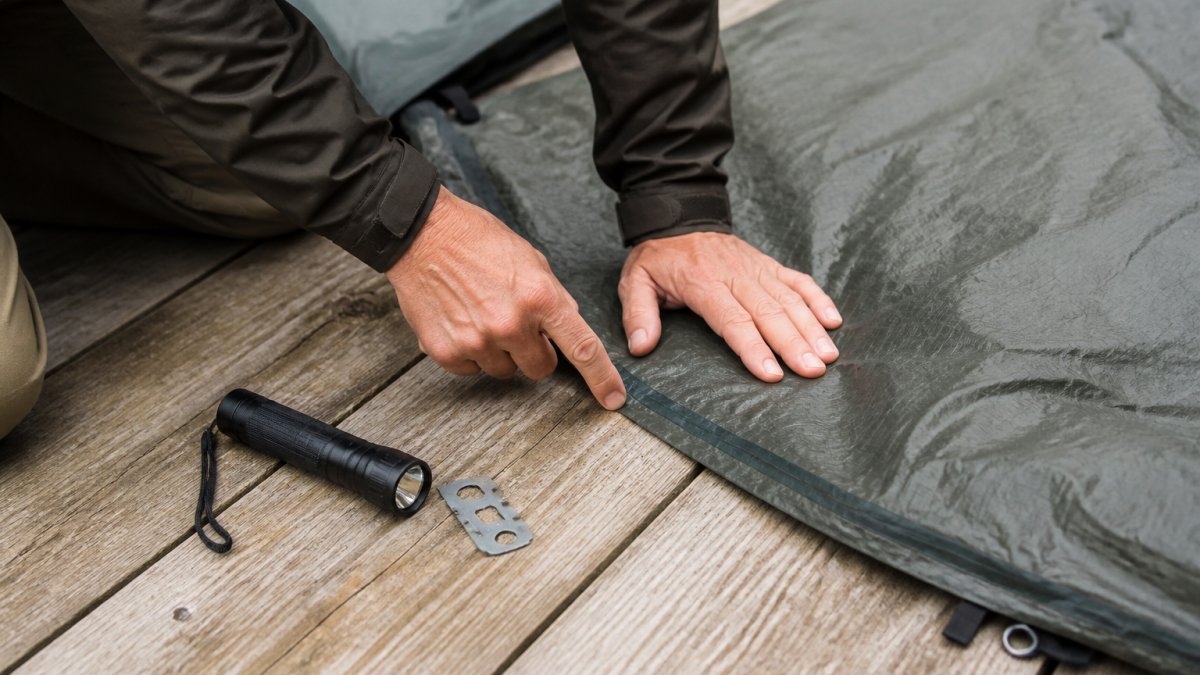
- Seams, pass/fail: Count stitches per inch along a straight run using the ruler. Pass: 8-12 stitches per inch, even tension, no skipped or loose threads, no puckering. Fail: fewer than 8 per inch, visible gaps when you pull the seam gently, or thread that frays when rubbed.
- Stress points, pass/fail: Locate bar-tacks or box-X stitching at strap anchors, tent corners, and zipper ends. Pass: reinforcement stitching present at every load point and no fabric distortion when you tug. Fail: single-line stitching at a load point, or the fabric ripples and the stitch line opens under a firm pull.
- Zippers, pass/fail: Run each zipper fully open and closed three times with one hand. Pass: smooth travel, slider stays where you leave it, no teeth visible behind the slider. Fail: snagging, splitting behind the slider, or a slider that drifts open under light tension.
- Hardware, pass/fail: Flex each buckle, clip, and cord lock. Pass: springs back to shape, no whitening or cracking at the flex point, teeth engage fully. Fail: brittle feel, hairline cracks, or a buckle that releases under a firm pull when it should stay locked.
- Fabric hand-feel, pass/fail: Squeeze a double layer between thumb and fingers and rub. Pass: dense, slightly stiff hand with no show-through of light when held to a lamp. Fail: papery or slick feel, light passes through easily, or the weave shifts visibly under friction.
- Waterproofing, pass/fail: Check for taped seams on the inside and a durable water-repellent (DWR) finish that makes water bead on the outside. Pass: seam tape continuous and adhered at every seam, water beads and rolls off. Fail: peeling or missing tape, water darkens the fabric immediately (DWR worn off), or seams wick.
- Weight and specs, pass/fail: Weigh the item on your scale and compare to the stated weight. Pass: within about 5% of the claim (packaging and stuff sacks account for small differences). Fail: more than 10% over the claim, which suggests substituted materials or an inaccurate spec.
- Fit and usability, pass/fail: Wear the item loaded and reach, bend, and twist. Pass: no restriction at shoulders or hips, adjustments stay put, pockets and closures reachable with gloves. Fail: pressure points, straps that slip, or hardware you cannot operate one-handed.
Seams, Stitching, and Stress Points
Stitch density is the single fastest tell. Quality garments and packs typically show 8-12 stitches per inch on main seams; below that, the seam has less reserve strength and is likelier to pull open under load.
Stress points concentrate load and should be reinforced with bar-tacks or box-X stitching. Apply a firm, steady pull at each anchor: a well-built pack or tent shows no stitch elongation or fabric distortion.
Zippers, Hardware, and Fabric Hand-Feel
Zipper quality separates gear that lasts from gear that frustrates.
Hardware should flex and recover without whitening or cracking. Squeeze each buckle and clip; a brittle feel or hairline crack predicts failure under load.
Fabric hand-feel is a proxy for density and weave tightness. Squeeze a double layer and hold it to a light: easy show-through means thin, less abrasion-resistant fabric.
How to Read Product Specifications and Verify Claims
A spec sheet is only useful if you know which numbers matter and how to check them. The goal is to move from "the listing says waterproof" to "I can confirm this rating against a documented test method", the step most gear guides skip.
Start with the numbers that have defined test methods:
- Waterproofing: Look for a hydrostatic head rating in millimeters (mm). This measures how much water pressure a fabric resists before leaking. A common pattern is that 1,500-3,000 mm suits light rain and general use, while sustained storms call for higher ratings.
- Insulation: Sleeping pads use an R-value, which measures resistance to heat flow. Higher R-values mean more insulation; the number should be paired with the intended temperature range.
- Fabric durability: Denier (D) describes yarn thickness, and a higher denier generally means a heavier, more abrasion-resistant fabric. Denier alone does not tell you weave quality, so pair it with the hand-feel check.
Then verify claims against independent documentation, not the seller's copy:

- Check the material label against the listing. The fiber content and fabric name on the sewn-in label should match the product description. Mismatches are a red flag.
- Look for a stated test standard. Waterproof and abrasion claims should reference a recognized test method. If a listing gives a number with no method, treat it as marketing until confirmed.
- Confirm certifications at the source. For safety and performance claims, check the certifying body's own directory rather than a badge image on the product page. Badges are easy to copy; registry listings are not.
- Weigh the item yourself. A kitchen scale accurate to 0.1 oz is enough. A difference of more than about 10% from the stated weight suggests substituted materials or an inaccurate spec.
- Ask for the warranty terms in writing. Warranty length and what it covers are part of the quality picture, and vague terms are a warning sign.
For guidance on what product and environmental claims actually mean, the Federal Trade Commission's guidance on environmental and product claims is a useful reference for spotting overstated marketing. And for textile performance standards, the ASTM International standards for outdoor fabrics explains how waterproofing and abrasion resistance are actually tested.
Treat every spec as a claim to be verified, not a fact to be trusted. Listings that name their test methods, publish complete weights, and match their labels are the products most likely to perform when the weather turns.
How to Spot Counterfeit Outdoor Gear Before You Pay
Counterfeit gear is one of the biggest threats to outdoor gear quality, and it's getting harder to spot. Fakes copy the look of a trusted brand while using thinner fabric, weaker zippers, and untested waterproofing.
Naturehike Star Trail EXT Ultralight Hiking Tent →
Start with the seller: buy from authorized retailers or the brand's own store, and be skeptical of prices that seem too low.
A practical rule: if a deal feels too good, verify the seller before you pay. For more on protecting yourself from fake goods, the U.S. Patent and Trademark Office's anti-counterfeiting resources explains how counterfeits reach buyers and what to watch for.
How to Evaluate Outdoor Gear Reviews Without Getting Fooled
Reviews are useful only if you read them right. Separate real field testing from noise by looking for specifics.
- Look for detail: real reviews mention seams, zippers, and conditions.
- Check the dates: recent reviews reflect current manufacturing.
- Read the middle ratings: three-star reviews often explain both pros and cons.
Don't trust a single five-star review. Look for reviewers describing long-term use and wear and tear, they've actually stress-tested the product.
How to Test Camping Gear Before a Trip: The Backyard Protocol
The best way to confirm outdoor gear quality is to test it before you depend on it. Set up your tent in the yard, load your pack, and wear your shoes around the house for an evening. This backyard protocol catches problems while the stakes are low.
Here's how we'd run it:
- Pitch the tent and check every seam and stake point.
- Spray it with a hose to test waterproofing and look for leaks.
- Load your pack to its rated capacity and walk for 20 minutes.
- Wear your shoes with the socks you'll hike in.
- Sleep on your pad one night to test comfort and insulation.
- Pack everything down to confirm it fits and compresses.
If something fails in the yard, it would have failed on the trail. Better to find out now.
Quality Differences by Gear Category: Tents, Packs, and Poles
Different gear fails in different ways, so your inspection should shift by category.
Tents live or die on waterproofing and pole strength. A tent like the Naturehike Star Trail EXT Ultralight Hiking Tent shows what to look for: a floor waterproof rating above 3000 mm and rigid aluminum alloy poles built for rugged routes.

Packs depend on stitching at stress points and hardware that holds under load. Load one up and check the strap anchors before you commit.
Poles come down to material and tips. Carbon fiber poles like the OKHEALING Foldable Carbon Fiber Trekking Poles stay light while resisting flex, and the tungsten steel tips grip on packed snow and mud.

| Gear Category | Main Failure Point | What to Inspect |
|---|---|---|
| Tents | Waterproofing, poles | Seam tape, floor rating, pole flex |
| Packs | Stitching, hardware | Stress points, buckles, load test |
| Poles | Tips, shaft material | Tip grip, shaft flex, locking joints |
| Shoes | Sole, upper seams | Tread wear, seam integrity, fit |
Conclusion
Judging outdoor gear quality takes practice, but the payoff is gear that lasts through real trail conditions. Start with the eight-point checklist, verify the specs, and test before you trust.
At Prestige Outdoor Homes, we make it easy to find durable gear in one place, from tents and trekking poles to fitness and home accessories. Every order ships free, so you can stock up without watching the total climb.
Frequently Asked Questions
How do you tell whether outdoor gear is well made?
Start with the seams: bar-tacked or double-stitched joins at stress points hold up far better than single lines of loose stitching. Check that zippers glide without snagging and that hardware is metal rather than brittle plastic. Then read the product specifications for concrete numbers, such as a floor waterproof rating above 3000 mm on a tent or a stated pole material like aluminum alloy instead of fiberglass. Gear that lists specific materials and ratings tends to back them up; vague marketing copy usually does not.
How can you check if outdoor gear is genuine or counterfeit?
Buy from sellers with a real return policy and verifiable contact details, and be suspicious of prices far below the normal retail figure. On arrival, compare the item against the manufacturer's published specifications: stitching count, hardware branding, and fabric weight should match exactly. Check that the outdoor gear quality checklist items all pass, look for misspelled labels or missing care tags, and confirm serial numbers or authenticity codes with the brand when they exist. Counterfeits usually fail on small details rather than the big ones.
How can you test camping gear at home before using it outdoors?
Set the tent up in the yard and run a hose over it for five minutes to check for leaks at the seams and floor. Load your pack with the actual weight you plan to carry, roughly 25 to 35 pounds for a multi-day trip, and walk a mile to see how the straps and stitching behave. Inflate your sleeping pad and leave it overnight to confirm it holds air. This home test catches most failures before they cost you a night in the field.
How do you evaluate outdoor gear reviews before buying?
Look for reviews that mention specific trips, conditions, and time frames, such as a tent used through three seasons of weekend trips. Skip ratings that only praise shipping speed or say the item looks nice. Cross-check a handful of detailed reviews against the product specifications to see whether complaints line up with real design limits. Reviews that flag a specific flaw, like a zipper failing after a season, are more useful than a wall of five-star one-liners.